Do you know the difference between a native mobile app vs. web app? And how are these apps different from hybrid applications?
In short, native applications are coded in a native language, for instance, Objective C for iOS development, and Java for Android, and these applications use native SDK for their specific platform. Native applications run on the device and they are distributed through App stores (e.g. App Store or Google Play).
Web applications are written with HTML, CSS and JavaScript and need web browsers to run in them and interact with users. Web applications run on multiple platforms.
Hybrid applications are built with a combination of HTML, CSS and JavaScript to offer a native webview (UIWebView in iOS or WebView in Android). They run on multiple platforms, can be distributed through App stores, and have access to devices resources such as camera, contacts, accelerometer and other.
Depending on the project you are working on, the business’s needs, the industry and the market, you get to decide which type of mobile applications meets the needs best.
But, as I will guide you through the development of a hybrid mobile app, you might ask: ‘Why should I choose a hybrid app?’.
The good answer is the one in which we consider the benefits of a hybrid app. So, what are the advantages of hybrid apps?
- Cost and time effectiveness
- Faster and simpler development
- Easy to maintain
- Ability to quickly change UI design without significant changes to business logic code
- Build multi-platform app with one line of code
- Access to specific device and OS features
- Greater freedom during development process
- Ability to get app in the iOS and Android app stores
But hybrid apps have certain drawbacks related to performance – they depend on the native browser thus they are not faster than the native apps.
Now, let’s see how you can develop a hybrid app using Drupal CMS and Ionic framework. I will show you how to build an Android hybrid app using Apache Cordova.
How to start?
#1 Drupal setup
The first step in the development process is to install Drupal 7.
Download Drupal source from the official Drupal site or use Drush to install it, whichever you prefer. I will not go through the installation process of Drupal as it’s very easy and simple, thus I will show you the steps assuming that you have already installed Drupal.
The next step is to install required modules in order to set up our REST server. We will use the following modules: Services and Libraries.
You can install it with Drush as follows:
drush dl services libraries && drush en services libraries Drush will ask you to install and enable dependencies ‘ctools’ – confirm this with ‘yes’.
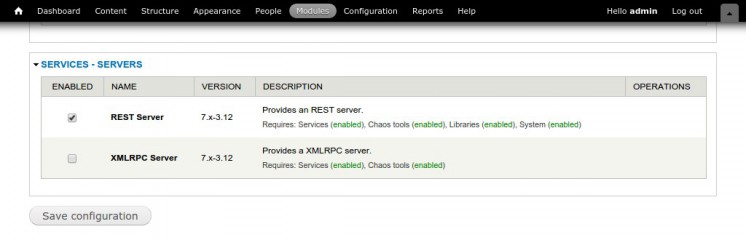
The next step is to enable REST Server. Go to the admin panel – Modules page – and at the bottom of the page check REST Server as showing in the picture below:
Now we can create our REST Server. Go to the Structure page and choose Services, and then click on Add. We have a few required input fields to fill : Name of the endpoint, Server and Path to endpoint.
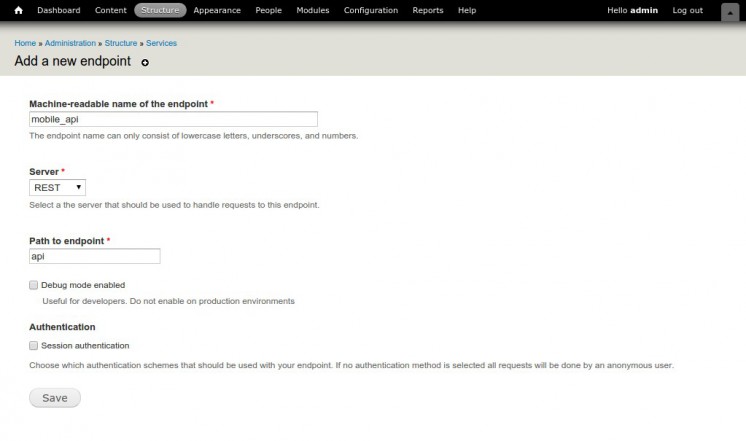 The example fields should be as follows:
Machine-readable name of the endpoint -> mobile_api
Server -> REST
Path to endpoint -> api
Add these information, and click Save.
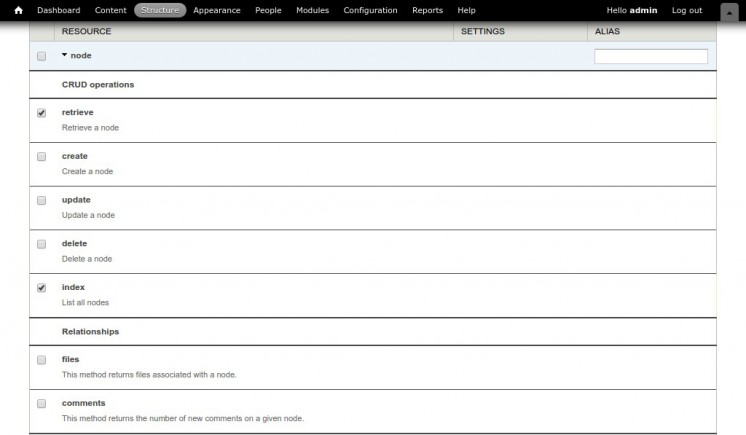
After creating Services, we need to set up Service Resources. Go to ‘Edit Resources’ link next to Our Service, you will see the list of resources, expand each resource and check the one you would like to use.
In our example we’ll be using the following resources:
Node:
- retrieve
- index
System:
- connect
User:
- retrieve
- index
Now it’s time to enable Server Response Formatters and Request parsing. Go to the ‘Server’ tab and make sure the following is checked:
Response formatters:
- json
Request parsing:
- application/json
- application/x-www-form-urlencoded
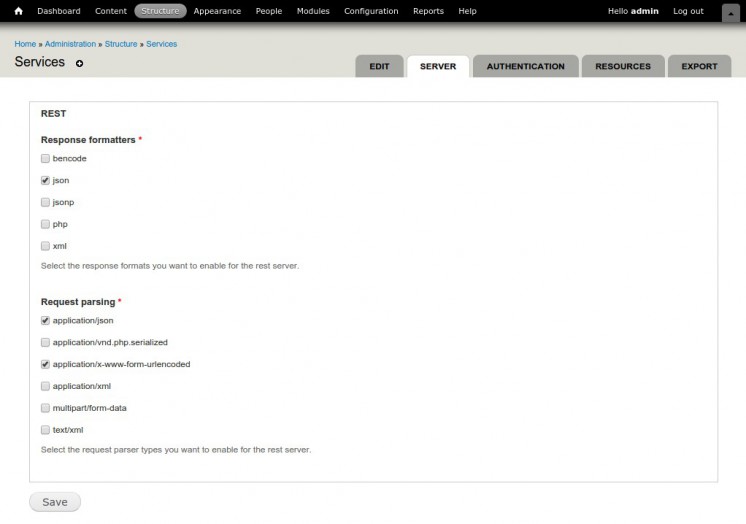 You can enable other formatters and parsing options as you wish, but for the purpose of this guide we’ll use only these.
You can test our created resource with REST client:
URL: http://localhost?q=api/system/connect.json
Actions: POST
If everything is set up correctly, Response Status should be shown as ‘200 OK’, and you should get the following JSON:
{
    "sessid":"lDHKvQzOu737g5dFI1249vZYyTDQQxamPxUbjbi1RfQ",
    "session_name":"SESSdb67617a77b376ef233a0e3e342ae54c",
    "user":{
        "uid":0,
        "hostname":"127.0.0.1",
        "roles":{
            "1":"anonymous user"
        },
        "cache":0,
        "timestamp":1433243265
    }
}
That’s it, now we have set up the REST server for our mobile app. However, we will not go through the process of developing the Ionic app.
The next step is to create Content, so add some nodes using ‘Base page’ content type, for example Home, Contact and Services.
#2 Ionic Application development
Overview and requirements
In order to install Ionic and Cordova we need to have NodeJS and NPM (Node Package Manager as it’s the default package manager for Cordova) installed. Go to the Node website, and install the node.
To build an Android application you need to install Java on your system and have Android SDK.
We will keep the scope of our app very simple. The app will contain the following:
- Dashboard – Welcome Page
- Posts – Teasers and full nodes
- Node details – Information about created and modified nodes
Create a new Ionic project
Ionic comes with a command line utility to start and build Ionic apps. To install Ionic and Cordova run this command in terminal after Installing NodeJS:
npm install ionic cordova -g We can now create a basic Ionic app – Ionic CLI provides a method for creating an app based on a few starter templates to bootstrap project. In our example we will use a blank template.
ionic start drupalApp blank This will generate the new Ionic project with all the files we need for building the application:
cd drupalApp && lsYou can see the following structure:
├── bower.json	        // bower dependencies
├── config.xml  	// cordova configuration
├── gulpfile.js 	// gulp tasks
├── hooks       	// custom cordova hooks to execute on specific commands
├── ionic.project       // ionic configuration
├── package.json	// node dependencies
├── platforms   	// iOS/Android specific builds will reside here
├── plugins     	// where your cordova/ionic plugins will be installed
├── scss        	// scss code, which will output to www/css/
└── www         	// application - JS code and libs, CSS, images, etc.
You can view the application live through the browser, and navigate to the root project running the following command:
ionic serveThis command starts a local server (based on express) and allows live-reload via websockets.
When you make changes to the app, you will see those changes immediately in the browser.
Configure the router of the app
Ionic doesn’t use the default angular router, but uses ui-router that helps with managing complex nested states.
We will add router configuration in drupalApp/www/js/app.js
Place the following code below .run method:
.config(function ($stateProvider, $urlRouterProvider) {

	$urlRouterProvider.otherwise('/app/dash');

	$stateProvider

  	.state('app', {
    	url: '/app',
    	abstract: true,
    	templateUrl: 'templates/app.html'
  	})
  	.state('app.dash', {
    	url: '/dash',
    	views: {
      	'app-dash': {
        	templateUrl: 'templates/dash.html',
        	controller: 'dashCtrl'
      	}
    	}
  	})
  	.state('app.home', {
    	url: '/home',
    	views: {
      	'app-home': {
        	templateUrl: 'templates/home.html',
        	controller: 'homeCtrl'
      	}
    	}
  	})
  	.state('app.nodeid', {
    	url: '/home/:nodeId',
    	views: {
      	'app-home': {
        	templateUrl: 'templates/node.html',
        	controller: 'nodeCtrl'
      	}
    	}
  	})
  	.state('app.details', {
    	url: '/details',
    	views: {
      	'app-details': {
        	templateUrl: 'templates/details.html',
        	controller: 'detailsCtrl'
      	}
    	}
  	});
  })
  .constant('REMOTE_URL', 'http://local.edblog/api/');
Note: We have added constant to the last line to define the constant which contains remote URL that will be used later in our controllers.
We will create Services using $http service because we need to do a simple HTTP request to remote/local server – as response we will get object.
What we need in our services is $statePaarams service as well because we should get object that will contain key per URL parameter.
Add a new file called services.js by adding the following code:
angular.module('starter.services', [])

  // Ged node content
  .factory('Drupal', function ($http, REMOTE_URL) {
	return {
  	nodes: $http.get(REMOTE_URL + 'node/')
	}
  })

  // Get node content by nid
  .factory('DrupalNode', function ($http, $stateParams, REMOTE_URL) {
	id = $stateParams.nodeId;
	return {
  	node: $http.get(REMOTE_URL + 'node/' + id)
	}
  });
We now have the following structure:
├── www                       	  	// www root
   	├── js                    		// our javascript directory
         	└── services.js   	 	// contain our controllers
         	└── app.js             	// already existing file
It’s time to create our controllers.
Add new Javascript file within the existing js directory, and name it as controllers.js
├── www                       	  	// www root
   	├── js                    		// our javascript directory
         	└── services.js   	 	// contain our controllers
         	└── controllers.js   	  // contain our controllers
         	└── app.js             	// already existing file
We have created a new controllers.js file and we should define the new module and new controllers first and then include our services.
Open and add the following code into controllers.js:
angular.module('starter.controller', [])

  .controller('homeCtrl', ['$scope', 'Drupal',
	function ($scope, Drupal) {
  	Drupal.nodes
    	.success(function (data) {
      	$scope.data = data;
    	});
	}])

  .controller('dashCtrl', ['$scope', 'Drupal',
	function ($scope, Drupal) {
  	Drupal.nodes
    	.success(function (data) {
      	$scope.data = data;
    	});
	}])

  .controller('nodeCtrl', ['$scope', 'DrupalNode',
	function ($scope, DrupalNode) {
  	DrupalNode.node
    	.success(function (data) {
      	$scope.data = data;
    	});
	}])

  .controller('detailsCtrl', ['$scope', 'Drupal',
	function ($scope, Drupal) {
  	Drupal.nodes
    	.success(function (data) {
      	$scope.data = data;
    	});
	}]);
We have created new services and controller module and it’s necessary to include them in our main ‘starter’ module.
In app.js make sure to update the following line:
angular.module('starter', ['ionic', 'starter.controller', 'starter.services'])Next what we should to do is to call these script to our index.html file:
<script src="js/controllers.js"></script>
<script src="js/services.js"></script>
Let’s get started with HTML Templates
Now we should code the views of our app – open the file in index.html., remove all within the body tag, and add the following piece of code:
<ion-nav-bar class="bar-assertive">
      <ion-nav-back-button>
      </ion-nav-back-button>
</ion-nav-bar>
<ion-nav-view></ion-nav-view>
Create a template directory called templates and within create the following files:
app.html, dash.html, home.html, node.html, details.html
├── www                   		// www root
   	├── templates          	// new created directory
         	└── app.html    	// contains tab content
         	└── dash.html   	// contains dashboard content
         	└── home.html   	// contains list of nodes
         	└── node.html   	// Contain full node
         	└── details.html	// contain details about nodes
Now it’s time to add code in our templates:
app.html
<ion-tabs class="tabs-striped tabs-color-assertive">
<ion-tab title="Dashboard" icon-off="ion-grid" icon-on="ion-grid" href="#/app/dash">
        <ion-nav-view name="app-dash"></ion-nav-view>
</ion-tab>
<ion-tab title="Nodes" icon-off="ion-ios-chatboxes-outline" icon-on="ion-ios-chatboxes" href="#/app/home">
<ion-nav-view name="app-home"></ion-nav-view>
</ion-tab>
<ion-tab title="Details" icon-off="ion-information-circled" icon-on="ion-information-circled" href="#/app/details">
<ion-nav-view name="app-details"></ion-nav-view>
</ion-tab>
</ion-tabs>
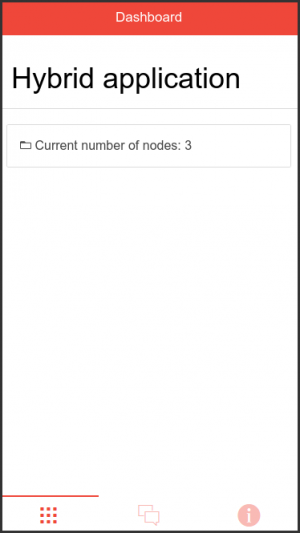
dash.html – This will contain the number of nodes and static title
<ion-view view-title="Dashboard">
<ion-content>
        <div class="item item-body">
              <h1>Hybrid application</h1>
        </div>
    <div class="list list-inset">
              <div class="item">
        <i class="icon ion-android-folder-open"></i>
        Current number of nodes: {{data.length}}
      </div>
    </div>
</ion-content>
</ion-view>
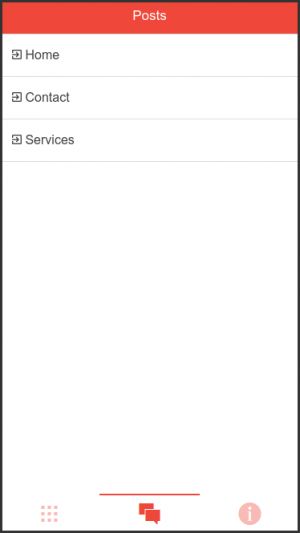
home.html – We use ng-repeat to list all nodes
<ion-view view-title="Posts">
<ion-content>
        <ion-list>
      <ion-item
          type="item-text-wrap"
          ng-repeat="item in data"
          href="#/app/home/{{item.nid}}">
        {{item.title}}
        <i class="icon ion-android-exit"></i>
      </ion-item>
</ion-list>
</ion-content>
</ion-view>
node.html – This template contains full node content
<ion-view view-title="{{item.title}}">
<ion-content class="padding">
        <h2>{{data.title}}</h2>
    <p>{{data.body.und[0].value}}</p>
    <div class="icon ion-clock">
              Updated: {{data.changed * 1000 | date: 'medium'}}
</div>
    <div class="icon ion-person">
              Author:
      {{data.name}}
</div>
</ion-content>
</ion-view>
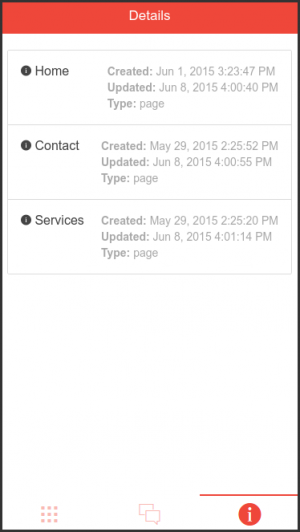
details.html – Information about nodes, such as created and updated nodes and a type of node
<ion-view view-title="Details">
<ion-content>
    <div class="list list-inset">

      <div class="item icon ion-ios-information" ng-repeat="item in data">
        {{item.title}}

        <span class="item-note">
          <div>
            <strong>Created:</strong> {{item.created *1000 | date: 'medium'}}
          </div>

          <div>
            <strong>Updated:</strong> {{item.changed * 1000 | date:'medium'}}
          </div>

          <div>
            <strong>Type:</strong> {{item.type}}
          </div>
        </span>
      </div>
    </div>
  </ion-content>
</ion-view>
#3 Build A Hybrid Application
Configure Platforms, Build and Emulate App
Once we have built a web application we can create a build for this app. We are able to create iOS and Android builds but we can only deploy Android build to devices without a developer account.
Note: If you want to deploy iOS app on a device, you need to have the Apple Developer Account. If you don’t have it, you are only able to test the app locally on iOS emulator.
Let’s start with build and emulate our application – type the following in terminal:
Android:
ionic platform add android
ionic build android
ionic emulate android
iOS
ionic platform add ios
ionic build ios
ionic emulate ios
The command above will integrate the Android platform, build the application and launch the emulator with our app loaded in it.
The results should look like this:
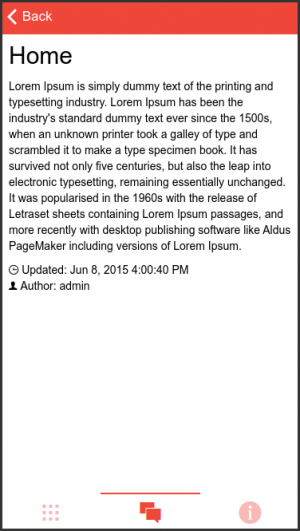
That’s how your hybrid app should look like.
You can view the demo on this link or download .apk file.
Remember: It’s important to consider whether you want to build hybrid or native applications.
Before you start with the development process, consider these questions:
- Do you want to target Android and/or iOS platforms?
- Do you want to distribute your application via App Stores (where user will receive regular update)
- Do you want to utilize specific capabilities of mobile devices?
Both native and hybrid applications have their strengths and weaknesses; moreover, they answer to different needs and preferences of users and developers. Thus, each of the apps can be a perfect solution for a particular type of a project.
However, if you want to use full native features (e.g. access to Camera, Contacts, etc.) then the native app development will work better as hybrid app may not have an access to needed native features. On the other hand, if you want to have the application that is cross-platform ready, a hybrid app is a way to go. Moreover, if you have a limited budget and need a good solution developed in a short time, hybrid apps are a good choice.
Stevica Knezevic has experience with AngularJS, jQuery, Ionic, Express.js, Node.js, Drupal, and various API’s, so feel free to ask any questions in the comments below.
Source: https://www.etondigital.com/how-to-develop-a-hybrid-app/